“JD! so I’m finally getting my own place, which means, I need my own kitchen stuff… any recommendations on knife brands? pots and pans as well, but I’ll probably get those for free from friends… CHOP CHOP!”
I’m not sure he was expecting what follows as my reply, but here it is. In this final post, I’ll talk about a very important part of a cook’s arsenal: knives.
As for knives! At home I’ll admit I can’t keep my home blade respectfully sharpened to save my life. Despite that, I’ve still managed to find some pretty worthwhile blades. I recommend investing in the following very affordable knives:
– Victorinox 10 1/4″ Wavy Edge Bread Knife with Fibrox Handle – a big, slightly bowed “bread” knife that is extremely durable, costs only about 20 bucks on Amazon, and will always do the job, even if it’s not so glamorous.
– For a “chef’s knife” I might go, again, with Victorinox, who make an 8″ blade with Fibrox handle also for about 20 bucks. A steel will whip it into shape for a good year before you consider taking it to a stone, but then you might be sad to have this cool knife that struggles through an onion. Personally, I use a very basic set of ceramic knives that you can most likely find at Bed, Bath & Beyond or a similar store that offers housewares for young people furnishing their first apartments. The kit included a long chef’s blade, an herb chopping knife, and a dastardly paring knife. I’ve had them for about seven months, no sharpening, and they all work just great.
In the case that you do get a metal-blade knife, make sure to get a honing steel, that cool thing you always see chefs clanking their knives on before they dive into some sort of meat-slicing job. Learn how to use it by watching Youtube or whatever it takes. Maintaining an at-least-moderately sharp blade is not only sensible, it’s safe. More knife accidents happen with inadequately sharp knives than with their cared-for brethren.
There are those who argue the merits of having a huge knife collection, so that you’re always prepared; on the flip side there are minimalists who say “just one knife!” I am content to supply myself with the blades I just mentioned, but occasionally I have found a need for a hefty meat cleaver (the best I’ve found so far are available for super cheap at international markets; it is not uncommon to find in a back corner of these kooky stores, next to the bamboo steamers, a box of reasonably sharp cleavers for under $10. I’ve had mine for two years, and it’s still going strong) and a long slicing knife, for slicing uniform, elegant and thin slices from roasts…these are dangerous knives indeed. In order for them to be justifiably useful, their blade must be kept EXTREMELY SHARP but the result when trying to achieve beautiful slices of fresh or country hams, brisket or large cheeses is unparalleled. Your average “chef type” would most likely recommend a filet knife, but I don’t spend much time with aquatic creatures in my kitchen, so I have almost no advice there. I have used one made by (you guessed it) Victorinox and it’s pretty good and inexpensive.
My last suggestion would be to seek out a Mandoline. Not the musical instrument! A mandoline is a pretty dangerous (if you think about it) but useful tool for achieving consistent and uniform slices of vegetables. A Japanese company, Benriner, makes excellent and affordable mandolines in two sizes (Small and Jumbo); both kinds come with various blade attachments to change the style of cut. Uniform slices and shreds at an adjustable width with just the flick of the wrist! I have done a lot of mandoline research, and have a lot of experience using models from many different price ranges. By far the best value is the super-affordable Benriner, but there are some other companies who make very fancy models with stands and vegetable-grippers (to “protect” your hand, though the pros all know using these can be more hazardous than without) and probably more attachments. Unless you have firsthand experience or a really good recommendation for one of these $200, steel-and reinforced/recycled/polycarbonate material show-stoppers I wouldn’t bother. I’ve seen the “legs” (which are supposed to hold the thing up and make your job “easier”) collapse under these things, and the ungrateful knuckle gushing afterward is really not worth it. In fact, you could just buy whichever model you want, just make sure to get yourself a reinforced, cut-proof Kevlar glove, available online or at most kitchen stores.
Overwhelming, right? I know, believe me. An invaluable step in achieving culinary greatness is outfitting oneself with the proper tools. Unfortunately, this step can take a reeeeaaallly long time and lots of $$…unless you avoid the thousands of dollars of mistakes that people like me (and dumber) have made. Luckily, there are plenty of resources to help point you in the right direction. Cook’s Illustrated, though a little pricey for what you actually get in that 1/8″ volume, is a great resource and has provided me with a lot of the tips I’m giving you today, and it’s available at most supermarket newsstands. All other points aside, it is important to take your time and invest wisely when buying kitchen tools. The right ones can last; the wrong ones will just leave a bad taste in your mouth.
]]>
“JD! so I’m finally getting my own place, which means, I need my own kitchen stuff…any recommendations on knife brands? pots and pans as well, but I’ll probably get those for free from friends… CHOP CHOP!”
I’m not sure he was expecting what follows as my reply, but here it is. In this post I’ll offer my suggestions for pans and bakeware. Next up is knives!
…As for pans, oh my! are there some terrible pans out there. Don’t even waste your time with those. You know the kind. They give you terrible results (usually thinner or unsatisfactory materials result in poor heat distribution, tipping or burning). If all you can get your hands on is a 10″ cast iron, get it and use only that. Then get yourself a nice big pot (hopefully with a sturdy, fitted steamer basket insert and a tight fitting lid), then a quart and two quart saucepan, then an 8 or 9 “ saucier pan (a deeper kind of frying pan with straight sides and a longish handle. I got mine, as well as a steamer pot that fits the above description, both from Calphalon – the steamer for a trade of a dozen tamales at a yard sale, and the saucier pan on sale for $35!! I had good luck, but you can too. Just keep your eyes peeled). Shopping for pans can be one of the hardest steps in outfitting your kitchen, as it may seem like a hefty investment. But with diligent shopping, price comparisons and a little bit of research (I find user reviews on Amazon an excellent resource for judging a new product…and of course, there is the convenience of being able to buy it as you’re reading…) you can find a set of pots and pans, even if it takes buying them one at a time, that will suit your needs.
If you go to the fancy kitchen stores like Williams-Sonoma, or similar shops you usually find in strip malls or tourist towns, you’re likely to face a beautiful display of Viking or All-Clad cookware. These companies, and several like them, love to wow shoppers with their gorgeous products, their “ergonomic handles” and “reinforced bottoms” and all sorts of silly features like that, but there are not many of us willing to shell out $120 for a pan to fry eggs in. If you ever win the lottery, I advise you to invest in a set of these, as they will probably last a couple lifetimes and yield excellent results every time. But until you have a career with benefits and at least 98% of your young-person debts paid, please don’t buy into the hype. Your friends and family will love you just the same.
Baking: Anchor Hocking makes great, cheaper-than-Pyrex glass baking dishes. Look for assorted sets of these at the aforementioned “first apartment stores”. Often these multi-packs can carry a nice value, and usually have a couple re-usable lids that make them perfect storage containers for leftovers. There are different packs for all kinds of needs – mixing bowls and small oven-safe baking dishes to huge roasting and gratin pans. Chicago Metallic makes nice half sheet pans (a “cookie sheet” for the home cook) – they even come with cooling racks in a set of 2! I use them all the time. Update makes a knockoff of the Silpat (silicone baking mat) that costs half of the name brand. If you don’t get your mixing bowls from Pyrex or Anchor, you should at least try to find a nice, restaurant-quality metal mixing bowl or two. I’ve always found it handy to have more than one, in case I’m doing several mixing projects at once (very likely for a guy like me), and sometimes, when company is over, these large vessels double as serving bowls for snacks.
…and stay tuned for the last installment in our overwhelming series on advice to outfit a home kitchen, on knives!!
]]>“JD! so I’m finally getting my own place, which means, I need my own kitchen stuff…any recommendations on knife brands? pots and pans as well, but I’ll probably get those for free from friends… CHOP CHOP!”
I’m not sure he was expecting what follows as my reply, but here it is. In this first post I’ll talk about basic kitchen equipment, the kinds of things I use. Then we’ll move on to pans and baking, and finally knives.
Over the past couple years I’ve learned many important lessons through trial and error about the must-haves for the home cook. Though this certainly isn’t an exhaustive list (exhausting, maybe), I think it covers most of the basics, with my personal experience weighing in on certain products and most importantly, a mind for value. Composed here is my guide for an on-a-budget home kitchen supply shopper; it is reasonable to say you could get all or most of these products, or careful approximations, for around $1,000 total. Considering all the horrible purchases I’ve made myself, that’s a pretty good deal!
Bottom line, don’t spend too much money on any kitchen supplies until you have really clear ideas about what you want. The one exception I always made was for useful pieces of equipment like stand mixers (sausage grinding attachments! Personally, I use a 1000 Watt Viking, but Kitchen Aid makes one that is much smaller, and more suitable for the average person’s needs, and is much cheaper), blenders (everyone puts off purchasing one of these, but they’re super valuable. Don’t sell yourself short and wait till one of your friends gives theirs up after a short-lived smoothie or blended cocktail phase) and food processors (I splurged and got a super-pro Cuisinart. I don’t use it a ton but it’s nearly indestructible and it’s always great to have around). Also, a spice/coffee grinder is a good gizmo to have…available for about 10 bucks at a Walgreens or CVS, they’re useful for making fresh chili or spice powders, also for grinding rice for making horchata or pulverizing coarse grains to a less substantial size for sprinkling into doughs for texture. At home, I actually have two.
Two other gadgets I might have mentioned are: a good toaster oven (that means don’t just grab the first one you see at the Salvation Army!!) and a rice cooker. Both are versatile tools that take up little space.
Up next…pots and pans and baking tools!! I never thought I’d be so excited!!
]]>You will need:
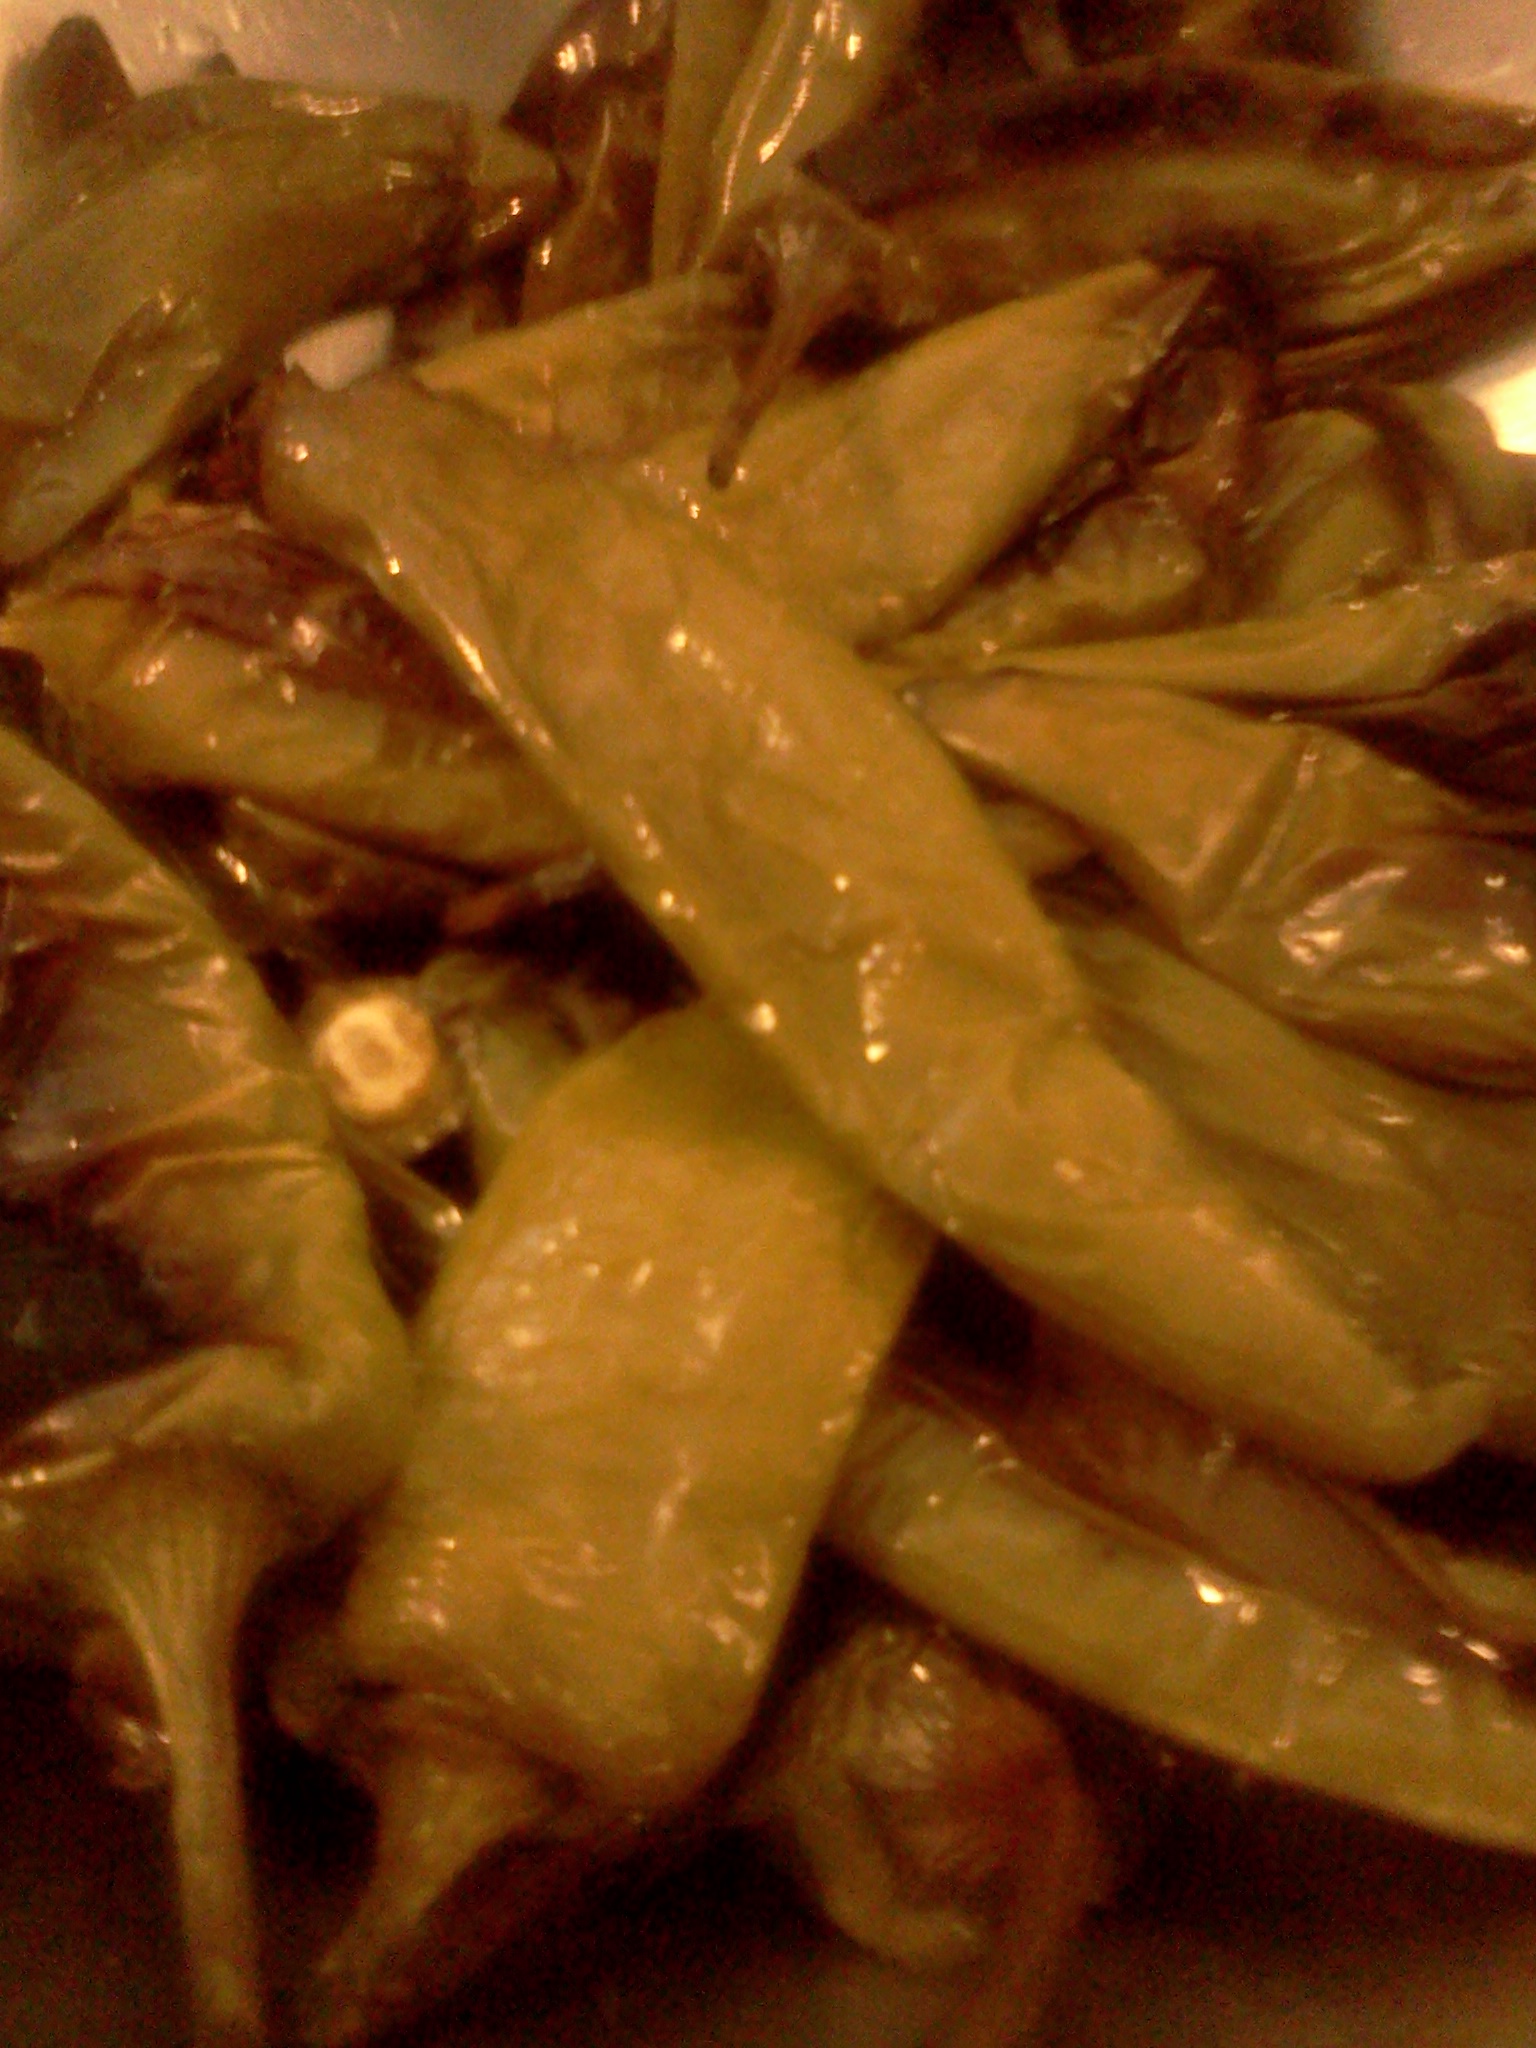
Preheat the oven to 400 F. Toss the Anaheims with a
splash of canola oil and roast until the skins blister and
blacken, about 30-45 minutes. Place them in a bowl
and cover with a plate or plastic wrap for about
fifteen minutes to allow the steam to loosen
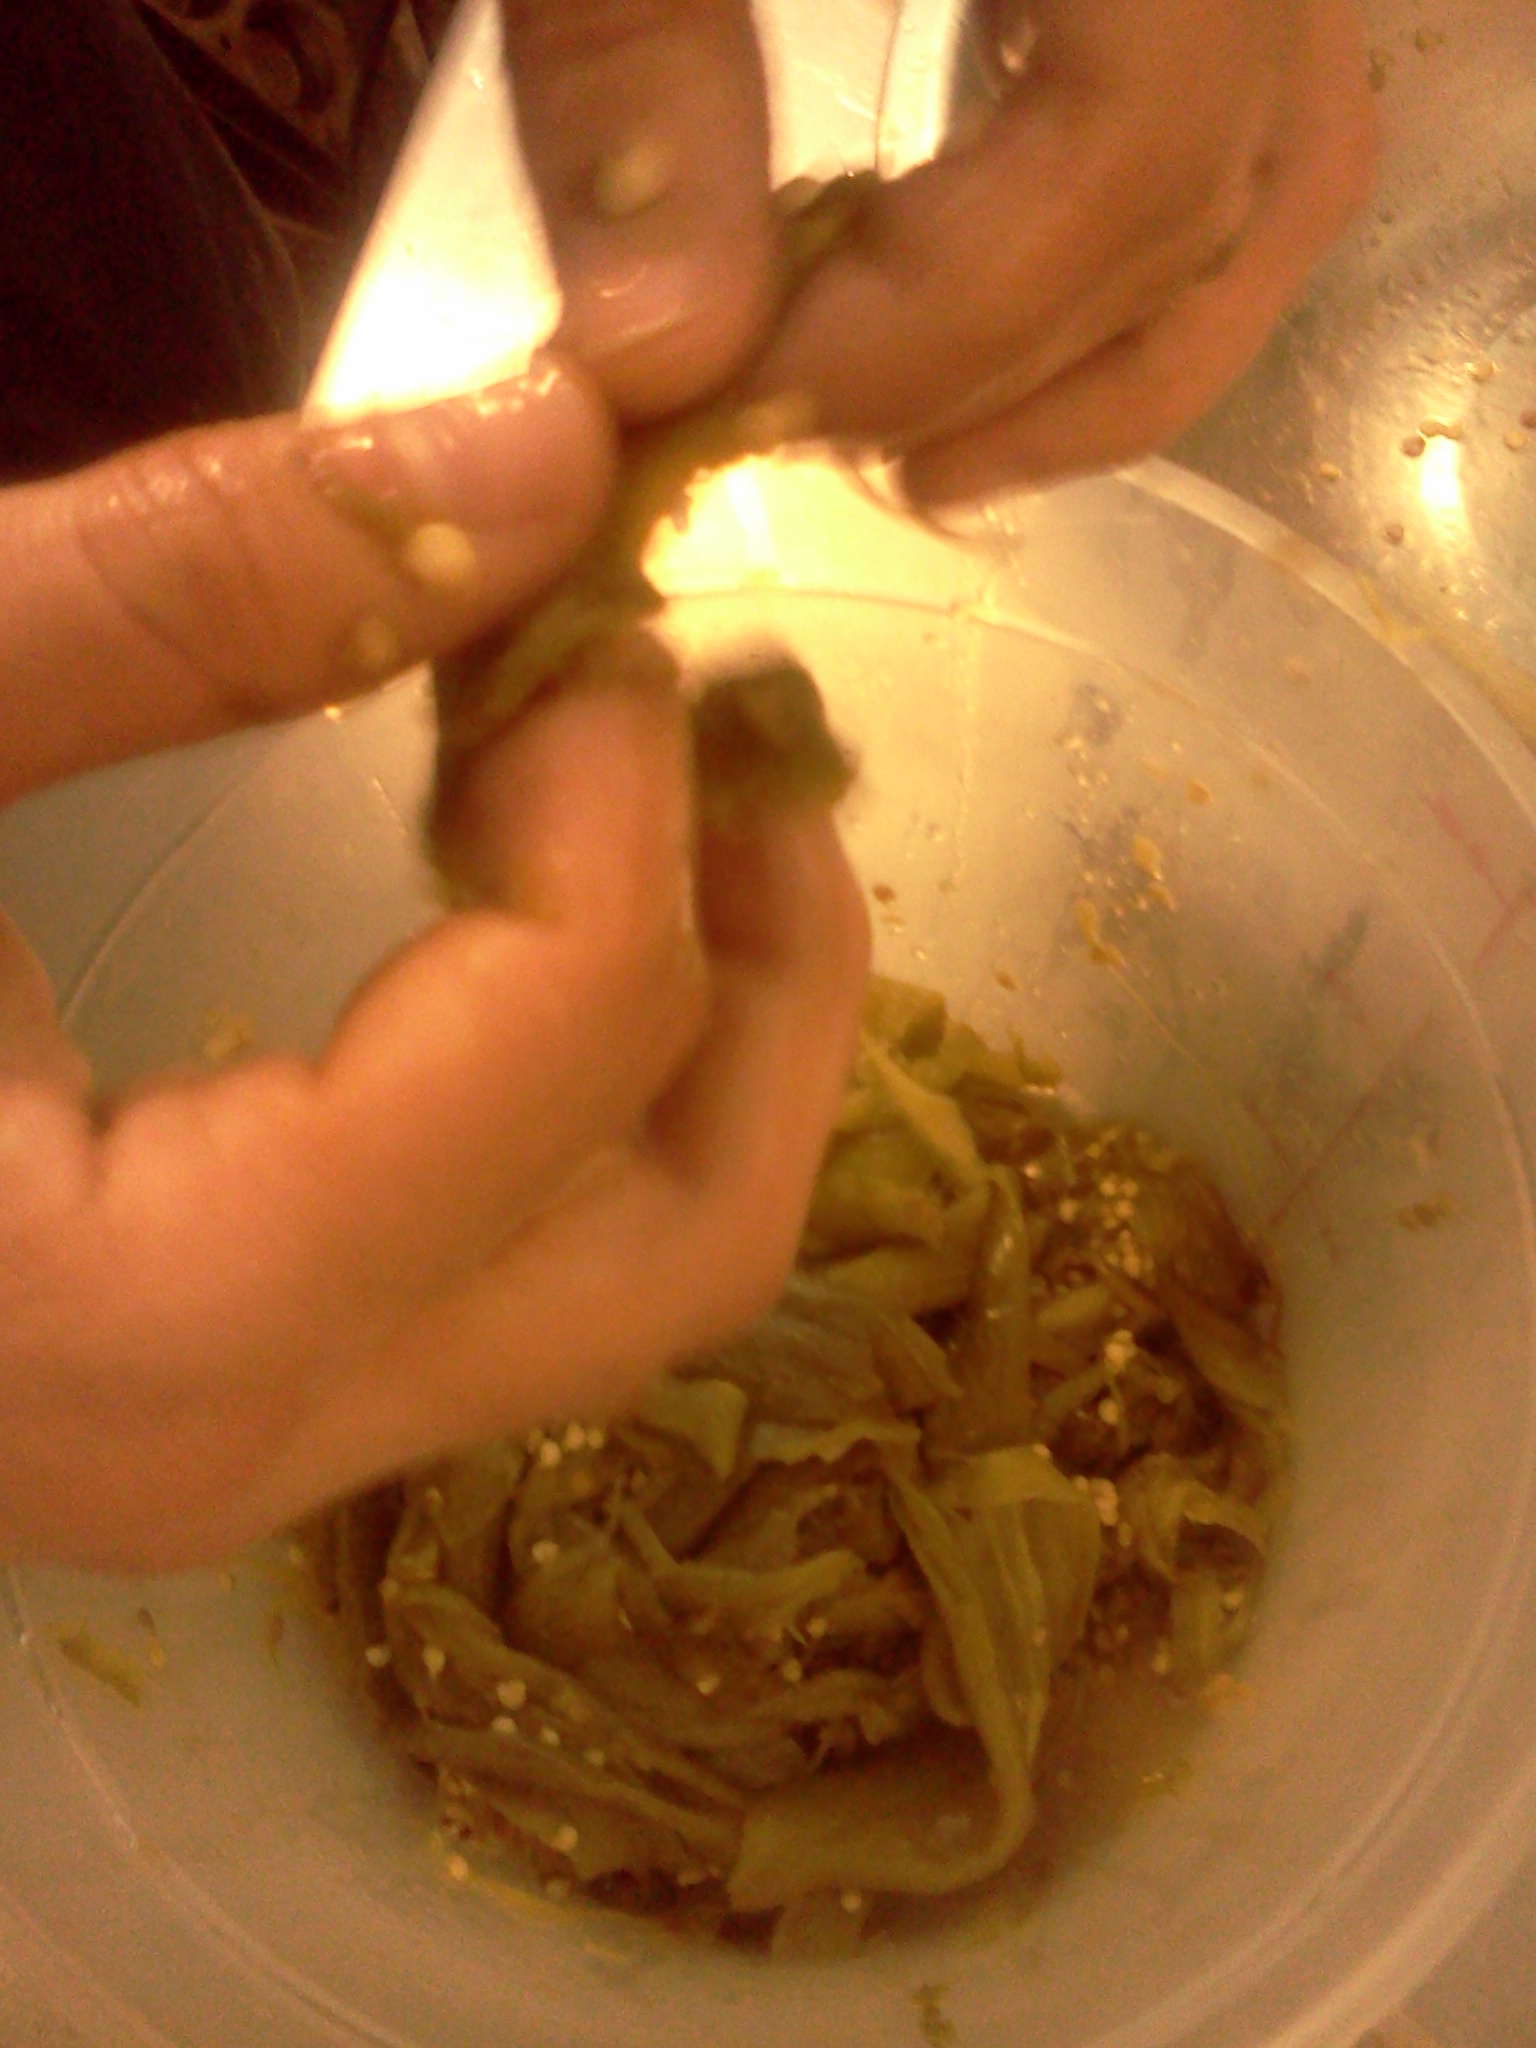
skins. When the peppers are cool enough to touch, remove the flesh, discarding the skin and the seeds.
Chop the cilantro and the scallions and add these, along with the roasted chilies to a blender, adding the 1/2 cup of vinegar. Pulse for about 30 seconds until a proper consistency is reached. If necessary you can add more liquid (vinegar, or a splash of water). Add salt to taste.
This recipe yields about a quart of salsa.
]]>
But today, I’ll share a secret with you, and only because it seems that hardly anyone here in Massachusetts understands the truth – THERE ARE NO BEANS IN CHILI.
Or at least, not in a proper Texas Chili. Don’t get me wrong, beans are great! But in this Texas Style Beef Chili recipe, you will notice a lack of nonsense ingredients, such as chocolate, coffee, weird vegetables or grains…basically anything that might distract you from the true beef flavor, you don’t want it. It might seem a little crazy, but it’s true. So, presented to you here, today, is a walkthrough of how we make our Texas Style Beef Chili – there are a lot of little steps that may seem silly or strange, but trust me, the end result is magnificent, best enjoyed with a chunk of cornbread and a sunset, if you’ve got it.
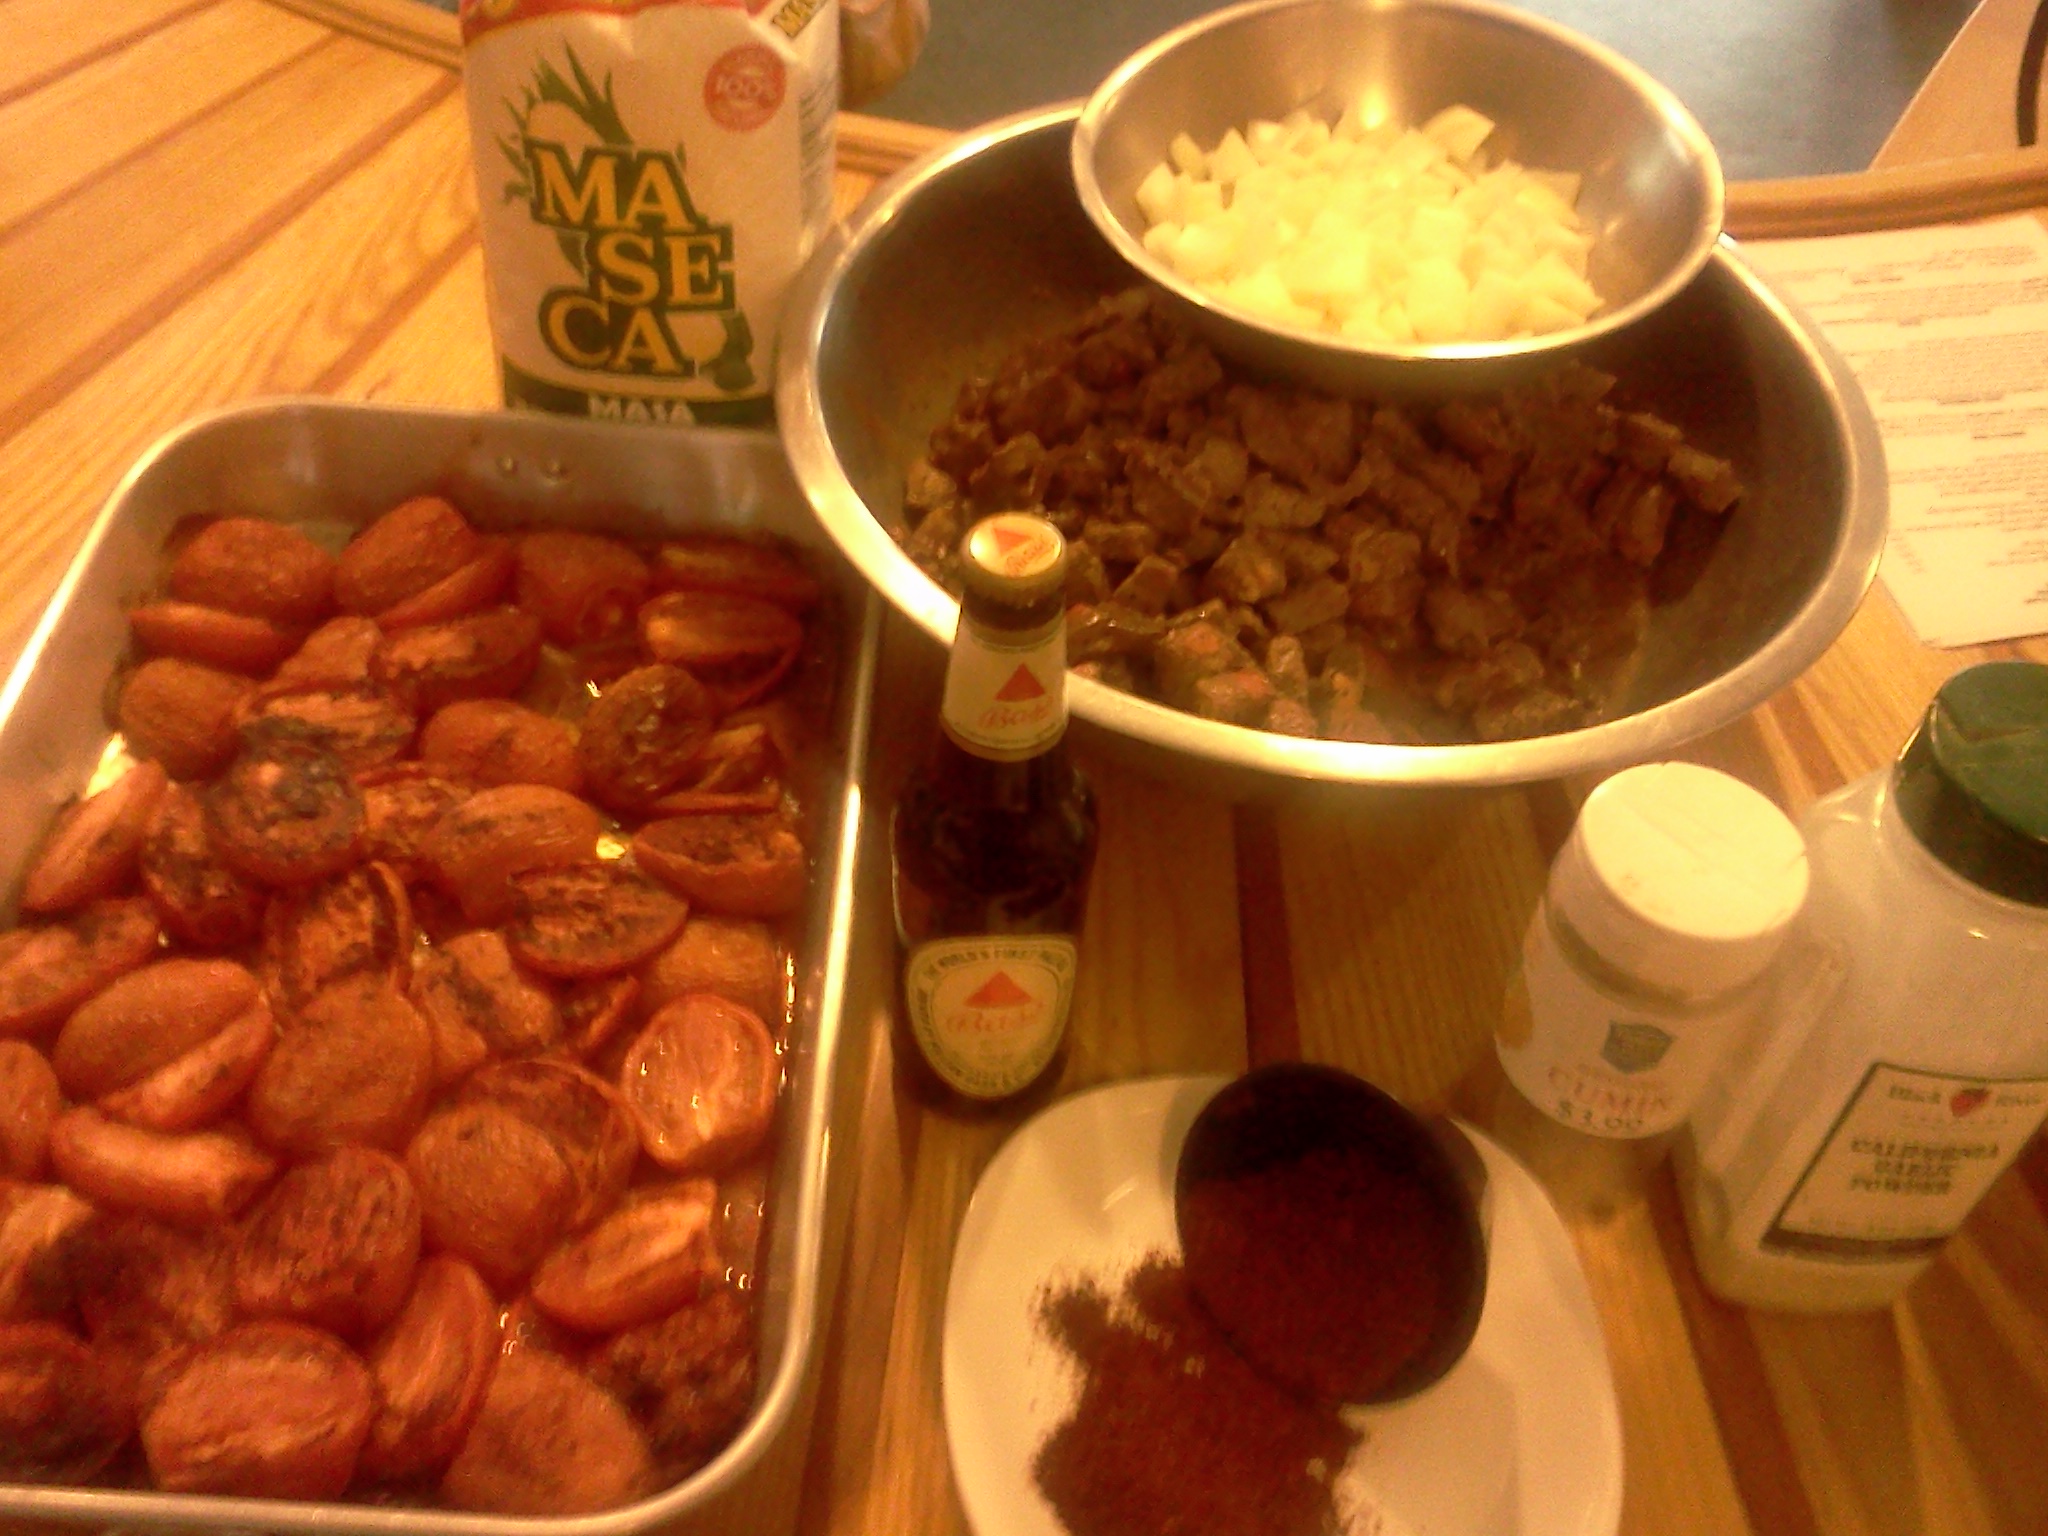
First off, your ingredients (keep in mind, the pictures you see here are for the restaurant, a little more than double what this recipe calls for):
2 lbs. beef chuck, cut into half-inch cubes
1 lb. beef brisket, cubed
1 med. white onion, diced
2 T. chili powder (we make our own, and you should too, but GOOD QUALITY store-bought is fine. remember, this is BEEF. CHILI.)
1-2 jalapenos, seeded and finely diced (if you’re nuts about the heat, you can add something crazy like a ghost pepper)
1 T garlic powder
1 T ground cumin
1 lb. roasted, quartered plum tomatoes OR 1 15 oz. can diced tomatoes
1 cup masa harina (a corn flour used for making tortillas – you can substitute 1 cup crushed corn tortilla chips)
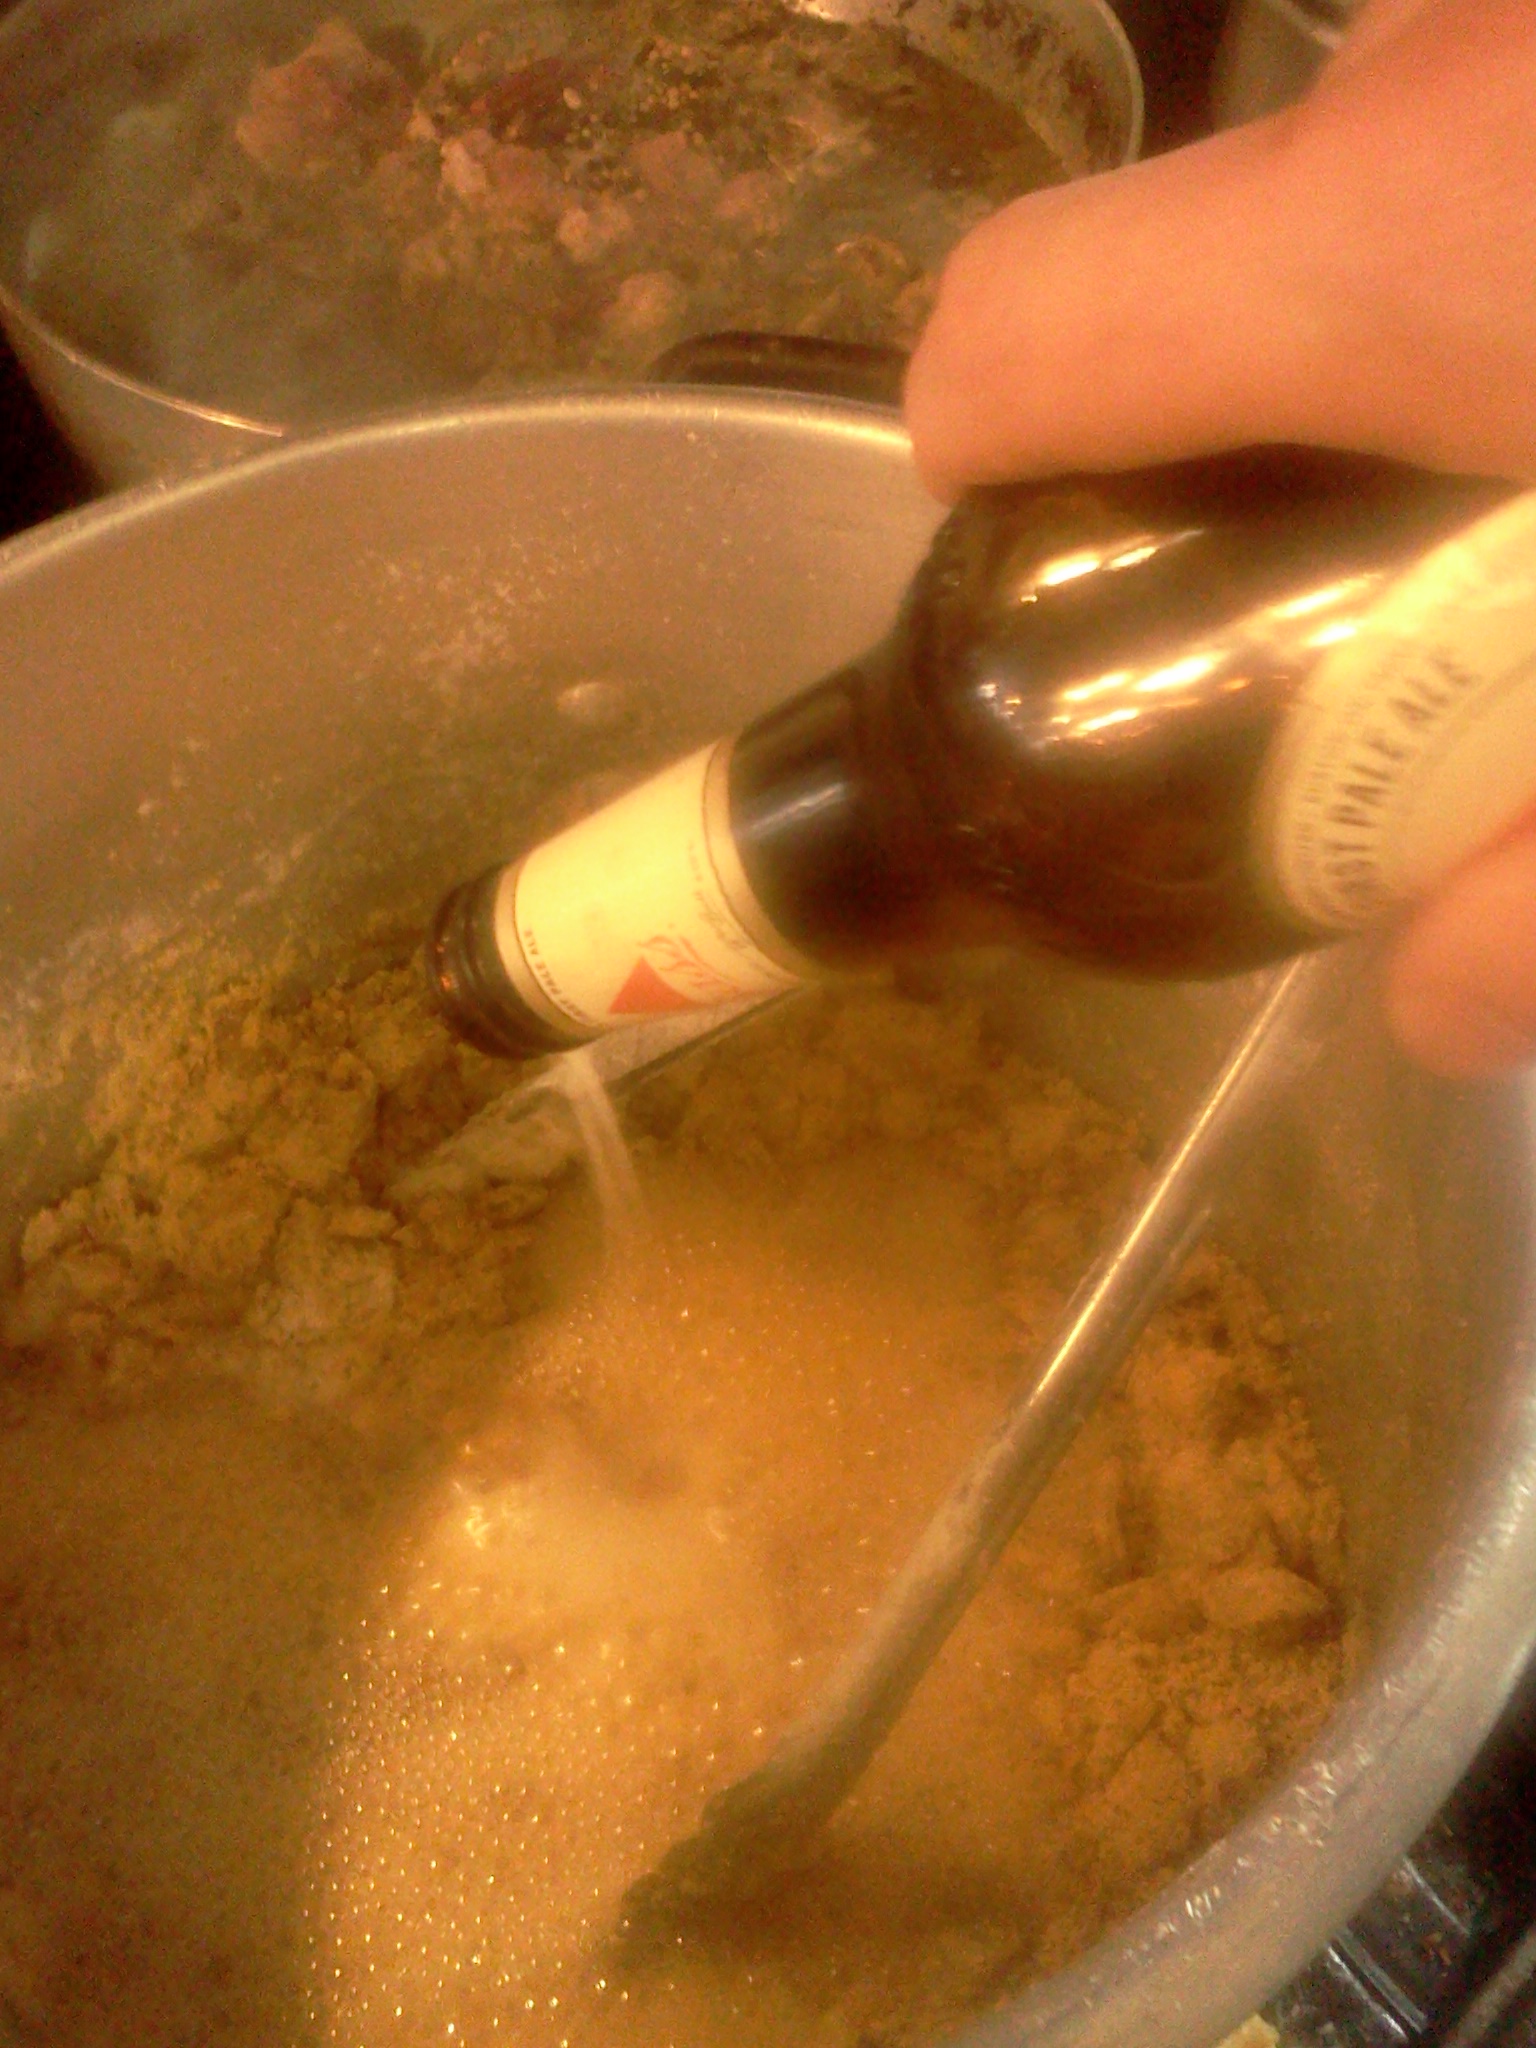
1 bottle pale beer, such as Narragansett
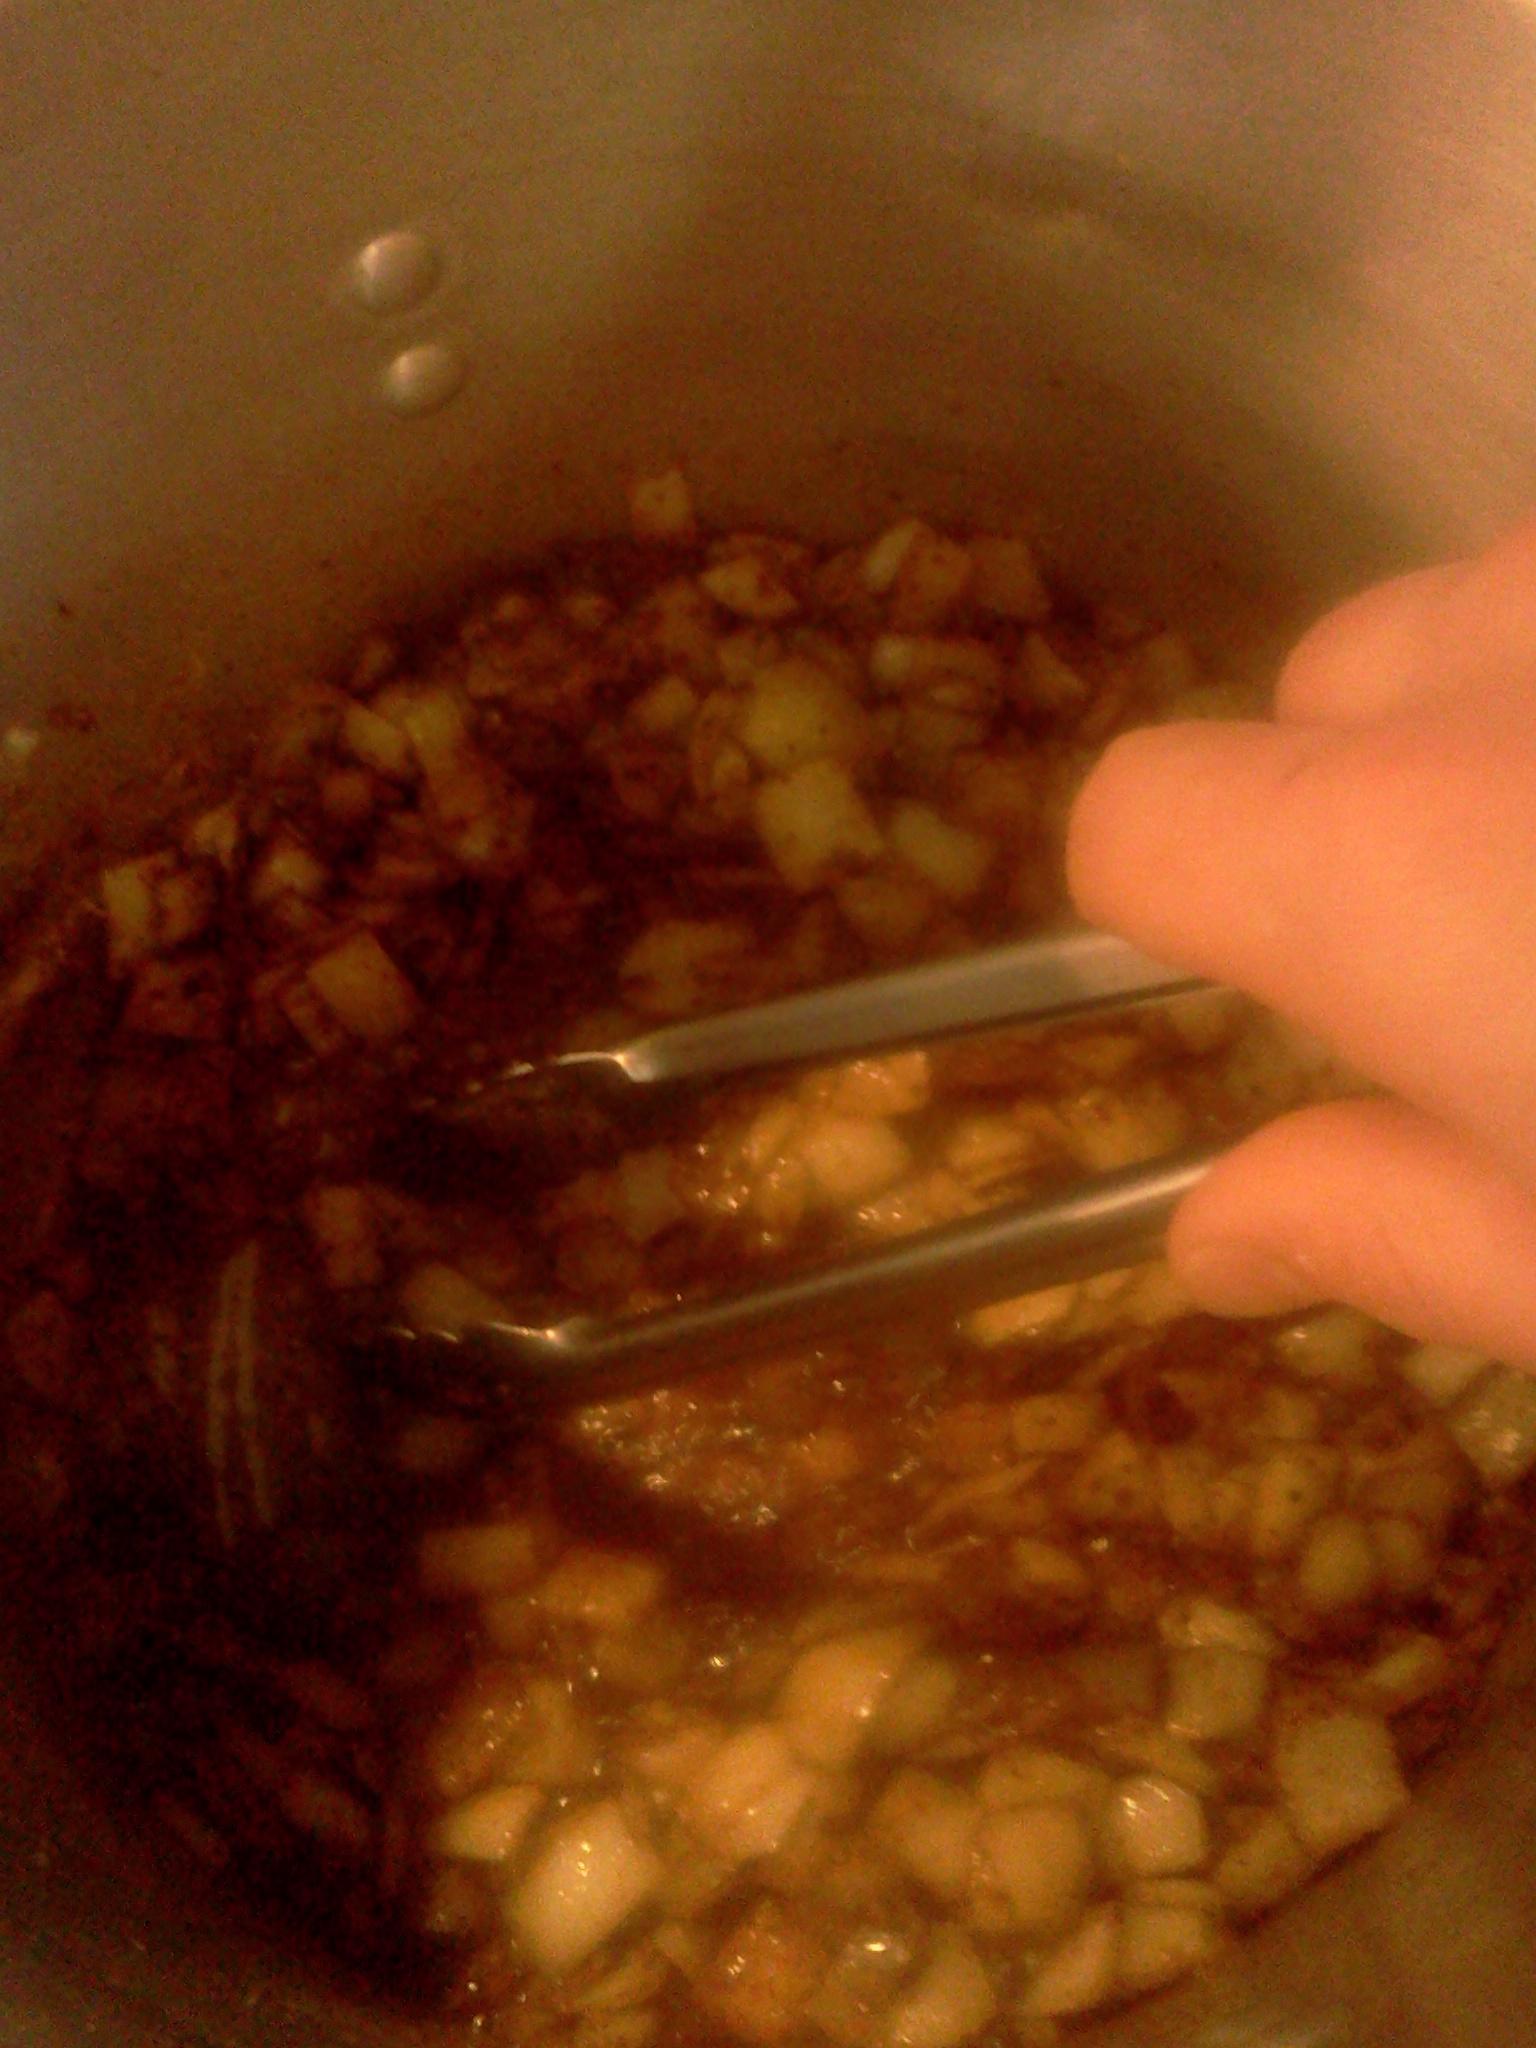
The first step is to take the cubed meat and toss it in a bowl with a splash of canola oil, salt and pepper to taste. Working in batches, and using the pot you plan to make the chili in, brown the beef over medium high heat. Set aside and add the onions to the pan, stirring to break up any bits of beef stuck to the bottom of the pan, and sauté for 8 minutes, or until they turn translucent. Add the ground spices and jalapeno and stir to incorporate. At this point your pan should have working a strong, flavorful base of onions cooking in beef fat and juices; the spices you’ve just added are marrying with the onions and developing their flavor; the aroma wafting up should be making you hungry, but WAIT! This next step is pretty fun. Stir in the masa harina or the corn chips, the beer and the tomatoes. This will bubble up and thicken and will serve as the liquid base for the chili.
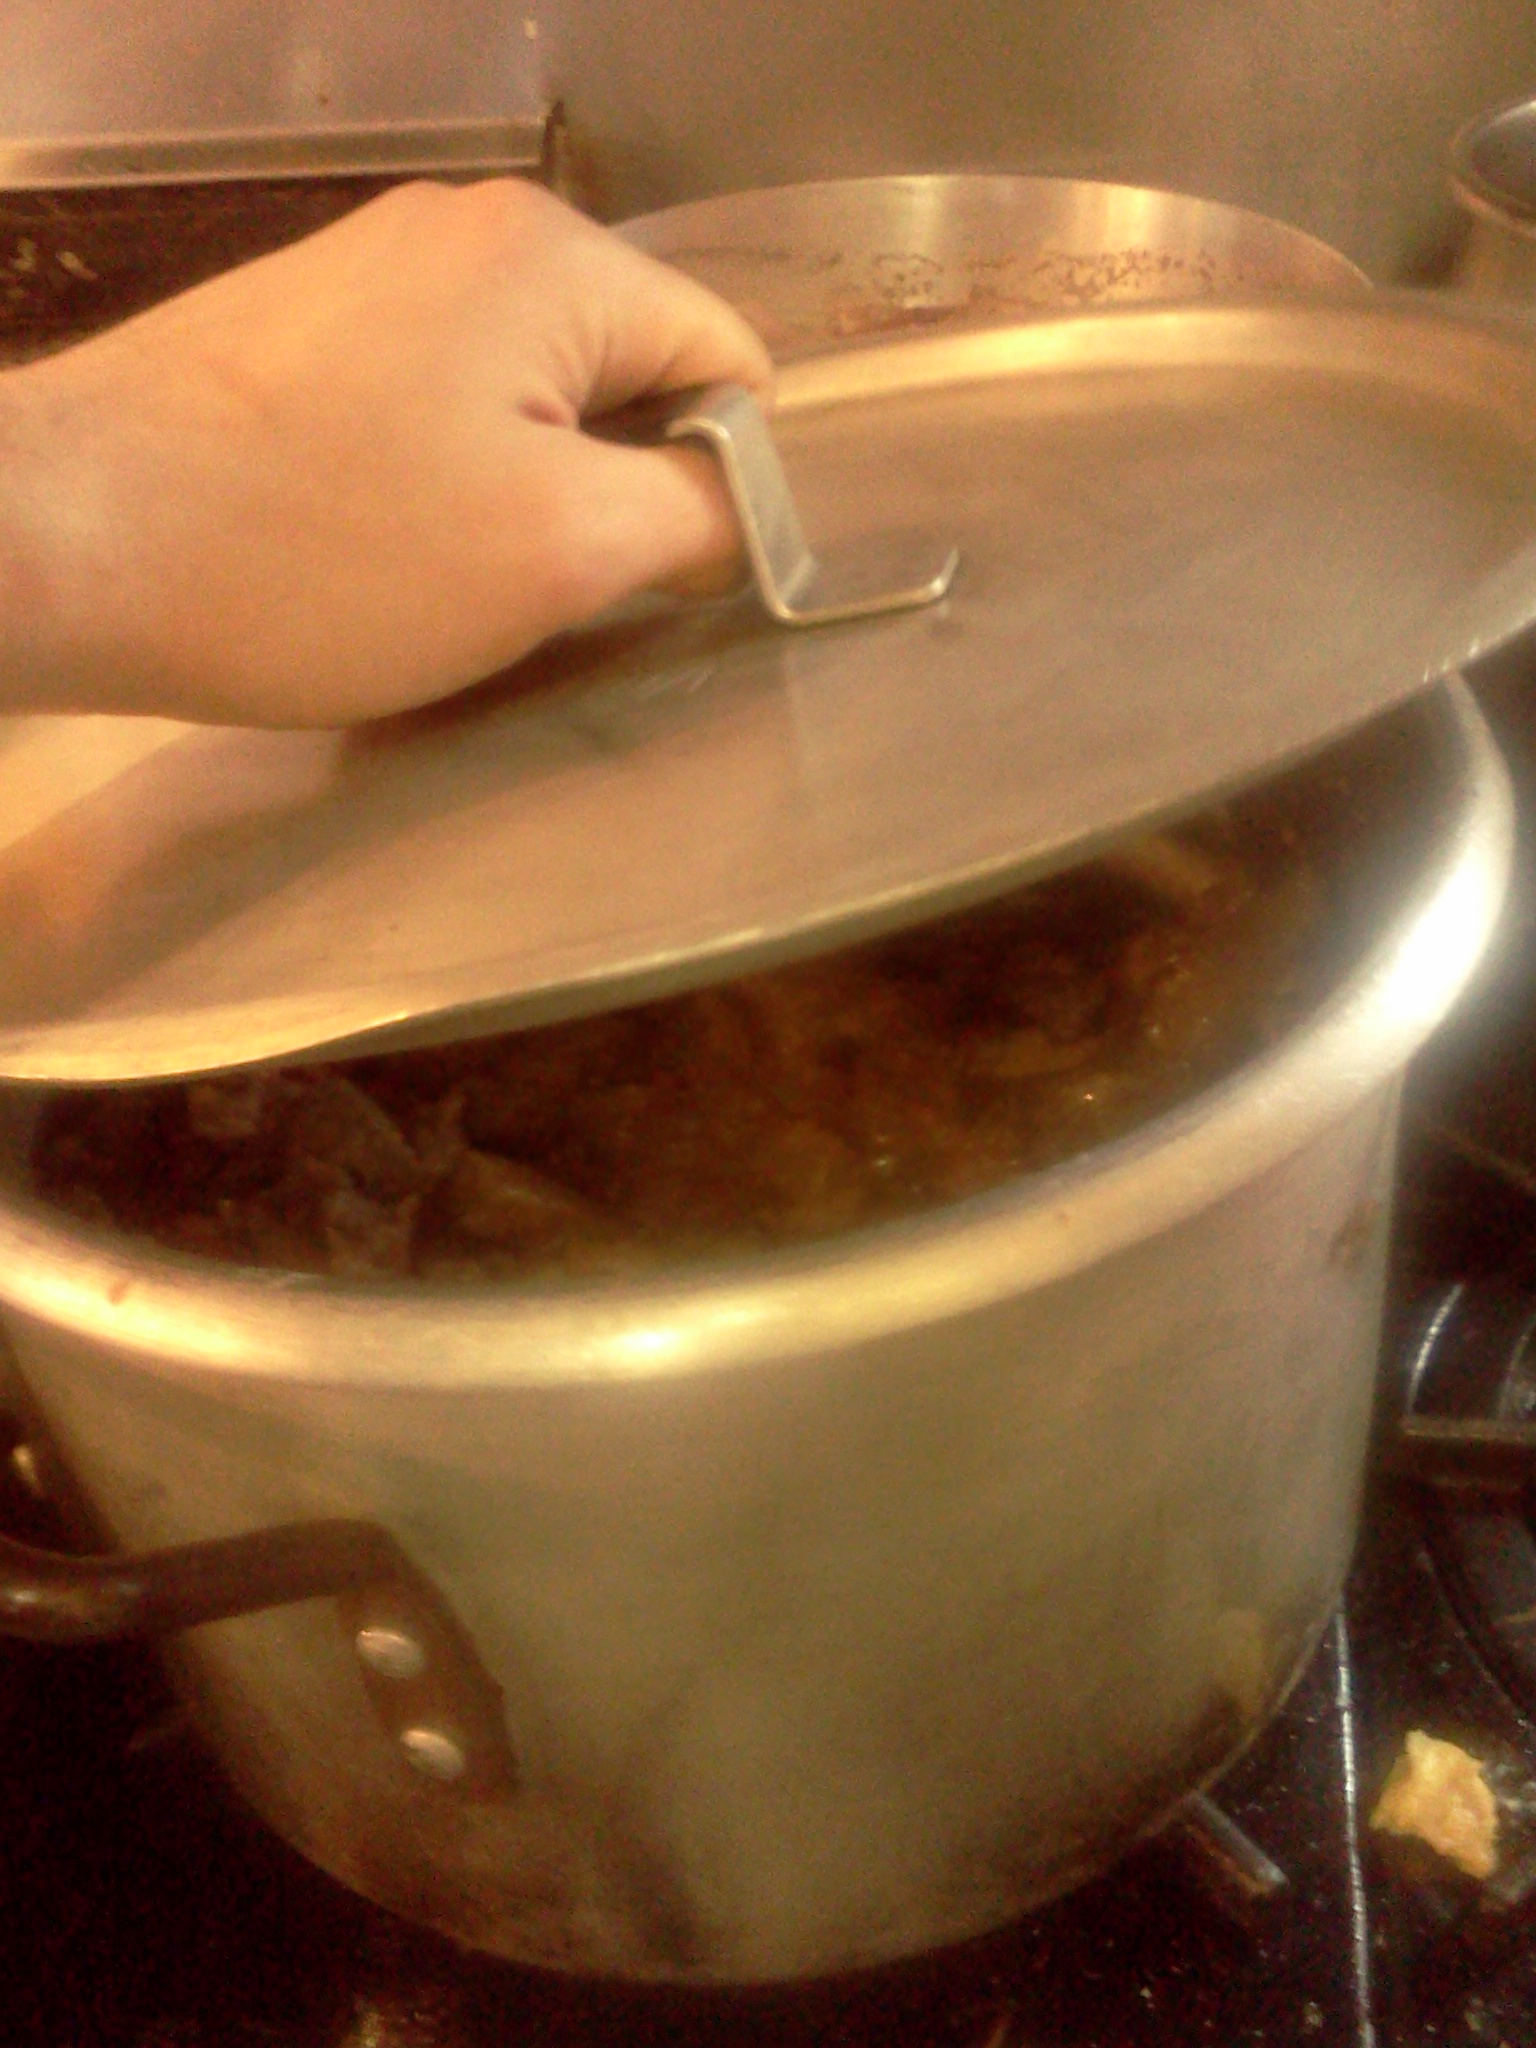
Seems skimpy, huh? You’re worried there’s not going to be enough liquid, and that’s okay! But give us a second here. Add the beef to the pot and give that a stir, how does it look? It should be thick, for sure, but there needs to be enough liquid so that through its long cooking time there’s enough moisture to simmer and bubble and reduce to a lovely consistency. If you’re feeling the need for a little more liquid, go ahead – add some more beer, tomatoes, water, or beef stock, but not too much!! Turn the heat down – WAY DOWN – and put the lid on. We’re going to let this sit for about two and a half hours with occasional stirring to let these tough cuts of meat soften to a fall-apart consistency. If the temperature is too high, the meat will seize up and be tough. If it’s low enough, this stuff should fall apart at the slightest touch, and that’s the ideal.
And here you can rest…for a while. The chili, sadly, won’t be ready for some time. If it were up to me, I’d have you take that chili once it was done, and let it sit in the fridge overnight. When it gets reheated the next day, the flavors have had more time to settle and I find the heat of the chilies to be less severe. But if you just can’t help it, now’s a good time to make yourself a batch of cornbread. I’ve got my favorite recipe, do you???
]]>The first two are behind us, but have you heard of our “Fancy Dinners”?
Serving Breakfast and Lunch all the time is great – we get up early, see the sun rise, drink coffee with the A.M. regulars, get in a good day’s work and go home with plenty of time to fill up the afternoon and evening. But even so, we couldn’t help but go for it and give ourselves a bunch more to do in the form of intermittent, crazy-menu B.Y.O.B. dinners at the restaurant.
We chose to hold these special events on Mondays, an atypical ‘fancy night out’, but perfect for our friends in the restaurant biz who often find that their favorite places are closed on that day. So far, the style we’ve chosen for our dinners is inspired by small-plates/sharing-style restaurants like Toro (in Boston), Momofuku (in New York) and The Girl and the Goat (in Chicago). It’s a great way to get people excited about trying all different kinds of dishes, and when friends order something totally great you wished you had picked, the sharing really helps cut away at that “Restaurant Ordering Jealousy Syndrome” that we all face from time to time.
The cool thing about the occasional nature of these Dinners is that we have a lot to play around with; we’ve learned something new each time we’ve hosted a special event at the restaurant, and the time in between events allows us to sit and think about how we can adjust elements of the experience to make it all the more memorable. The variables can all be changed! We’ve already seen that our nighttime Taco Parties can be fun, and that people love an a la carte menu featuring our usual wacky flavor combinations, but what’s next? Maybe we’ll do a prix fixe tasting menu that showcases the flavors of our Southern roots, or an Americanized dim sum experience like they’re doing at State Bird Provisions in San Francisco. Maybe Fancy Dinner #3 will be “Dinner and a Movie”…who knows? What matters here is that we’re constantly thinking of new ways to get people excited (and that includes ourselves!) about eating out, and having a good time in the company of friends.
Keep an eye on our Facebook page for further updates!
-jd
]]>We will be crankin’ them out from now until Christmas! All pies $16. Pumpkin, Clarkdale Caramel Apple, Sweet Potato & toasty marshmallow, Chocolate Cream, Southern Pecan!
pies
pies
pies
Order now for pickup the day before the holiday. You can say you made it…they won’t know! We won’t tell.